|
|
Post by Joel_W on Nov 1, 2019 9:08:59 GMT -8
JC,
Thanks for the picture. Interesting that the Block is unpainted in the photo, as I've also seen it that way on a few restorations, but Roush/Yates engines actually had a the block painted a Gloss Black. Go figure that one out.
Paul actually has one of the Roush/Yates engines in his garage. So he sent me all the various colors.
Joel
|
|
|
|
Post by afx on Nov 1, 2019 9:30:26 GMT -8
JC, Thanks for the picture. Interesting that the Block is unpainted in the photo, as I've also seen it that way on a few restorations, but Roush/Yates engines actually had a the block painted a Gloss Black. Go figure that one out. Paul actually has one of the Roush/Yates engines in his garage. So he sent me all the various colors. Joel Joel, maybe you or Paul could share the engine photos in the Reference Materials & Photos section? |
|
|
|
Post by Joel_W on Nov 1, 2019 11:39:32 GMT -8
JC, Thanks for the picture. Interesting that the Block is unpainted in the photo, as I've also seen it that way on a few restorations, but Roush/Yates engines actually had a the block painted a Gloss Black. Go figure that one out. Paul actually has one of the Roush/Yates engines in his garage. So he sent me all the various colors. Joel Joel, maybe you or Paul could share the engine photos in the Reference Materials & Photos section? JC, I'll try to post a whole series of pics on the Roush JPS Mustang, but all my engine pics are topside or bottom side. Joel |
|
|
|
Post by arcticwolf on Nov 1, 2019 12:23:04 GMT -8
JC, Thanks for the picture. Interesting that the Block is unpainted in the photo, as I've also seen it that way on a few restorations, but Roush/Yates engines actually had a the block painted a Gloss Black. Go figure that one out. Paul actually has one of the Roush/Yates engines in his garage. So he sent me all the various colors. Joel Joel, maybe you or Paul could share the engine photos in the Reference Materials & Photos section? I'll take some pics of it when I can, but I have to move 20 sheets of drywall first to get at it.
But mine is a much later motor, I'm sure theres been a few changes over the years. Will post when I can.
|
|
|
|
Post by Joel_W on Nov 3, 2019 8:16:25 GMT -8
Well, another week has passed, and it's time once again for my weekly update. My focus started out with building up the chassis, cockpit, trunk, and engine sections. All the various basic parts for these areas were primed with Mr. Hobby Gray #1500 primer, Then all the parts were painted with Tamiya X-1 Gloss Black. Those parts that needed various shades of Aluminum, Steel, & Polished Steel were air brushed with the proper Alcad 2 color. Some small parts I opted to hand paint with either Testors Bright Silver, or various shades of Mr. Color Metalizers. The side frames each have various lines that are wrapped in a protective rubberized casing to protect ones hands from being burnt. The color really varies all over the place due to dirt, grime, grease, oil, and what not. Since I found it basically impossible to mask them, I hand painted them with multiple coats of Ammo Mig Matt Red. Still the high spots didn't cover as well, giving the effect of wear & tear. The instructions call out for the oil filter to be painted Red which makes no sense as that's the color that STP used on their products, and Fords usually used AC Purolator filters that were White. A few pictures of Roush Yates Crate V8 motors show White oil filters, so I went with White. The radiator and housing were glued into position, then the front steering assembly with the rubber boots being painted with Tamiya XF-69 Nato Black for some much needed contrast. Then the dry sump oil tank and battery housing were glued into the rear of the chassis. All the various lines and wires I'm planning on, will be added much later into the build. I opted to hand detail paint the rear shocks rather then cut them off the frame supports as you won't really see much of them once the rear shell is installed. Next up I glued both side frame rails to the chassis, which brings up a major gluing issue. Seems that for some strange reason Tamiya Extra Thin just won't melt and join any parts molded in Black. Now these parts don't really feel like, sand, or polish like regular plastic molded parts do. I opted for the smaller parts to use either CA or Gel CA glue. For larger parts like the frame rails where I needed a lot of working time for alignment and proper fit, I reverted to Testors Liquid glue. Worked great. Just like their tube glue from the good old days. 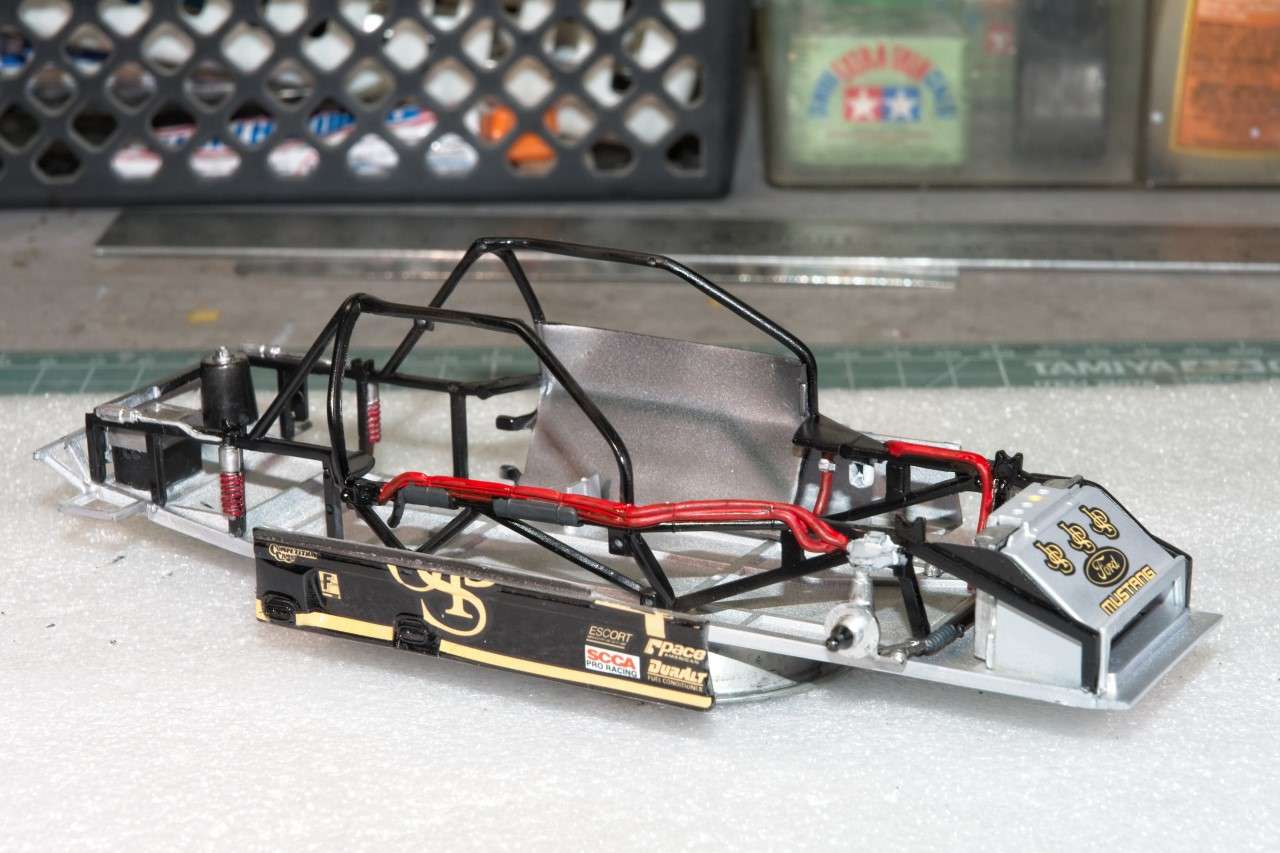  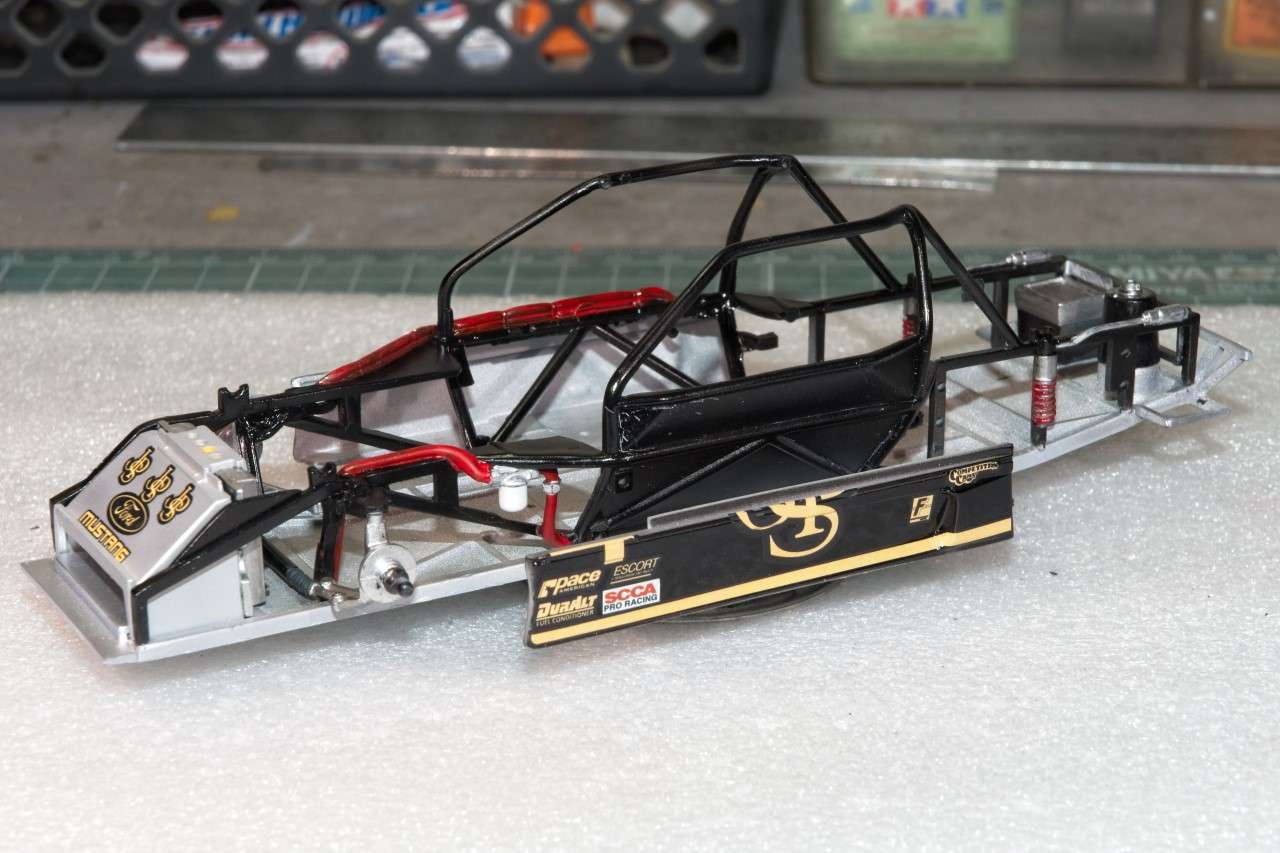 And finally yesterday, I got around to Clear gloss coating the body shells and sides of the chassis pan. I still use Mr. Color C46 Gloss thinned with Mr. Color Leveling Thinner. Only now I changed from a 1:1 ratio to a 2:3 ratio. Two tack coats 5 min apart. Then two wet coats 15 min apart. The 2nd wet coat was applied with a slower pass closely watching how it was laying down, and making slight corrections as needed. Here's 3 pcs of the glossed shells. Nothing has been done to them at all, as I'll give them a full 5 days to dry & cure. 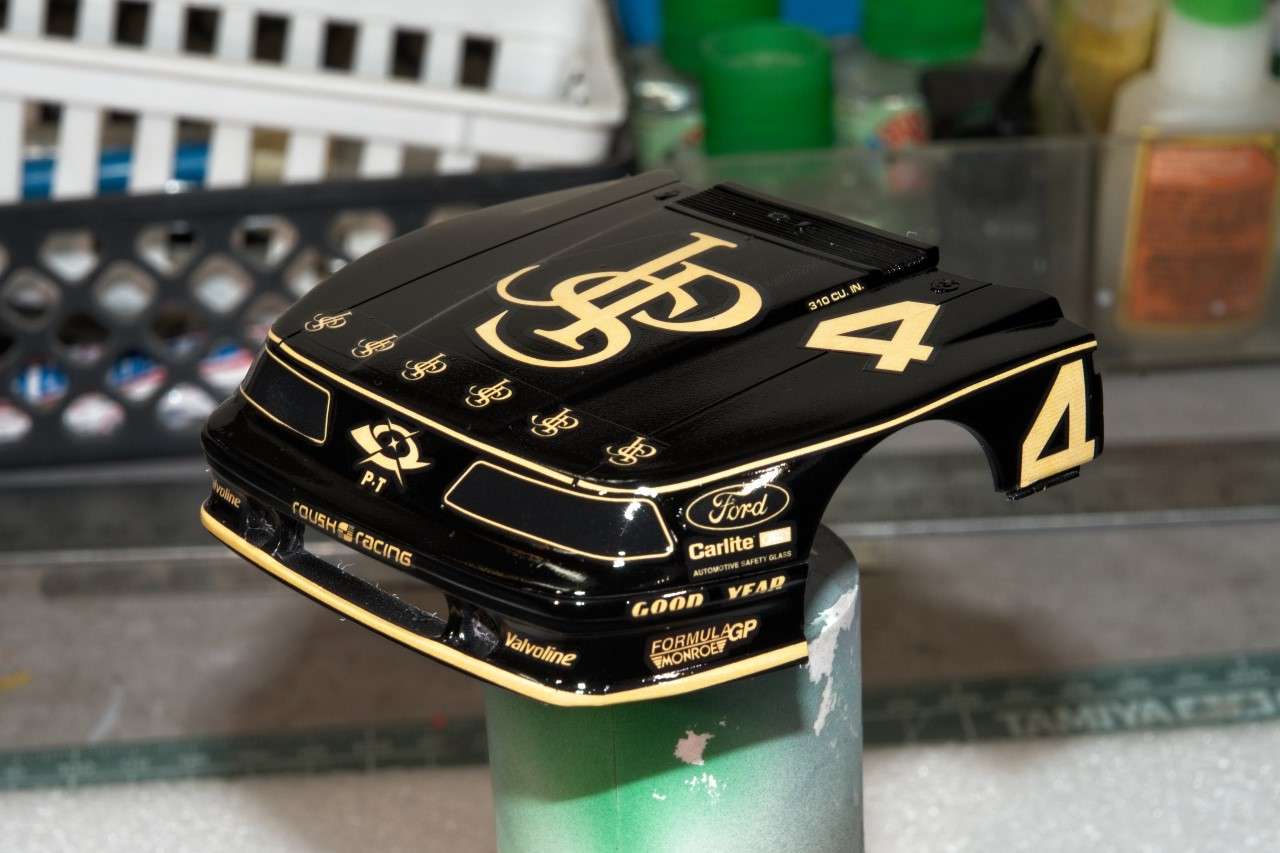 ![]() 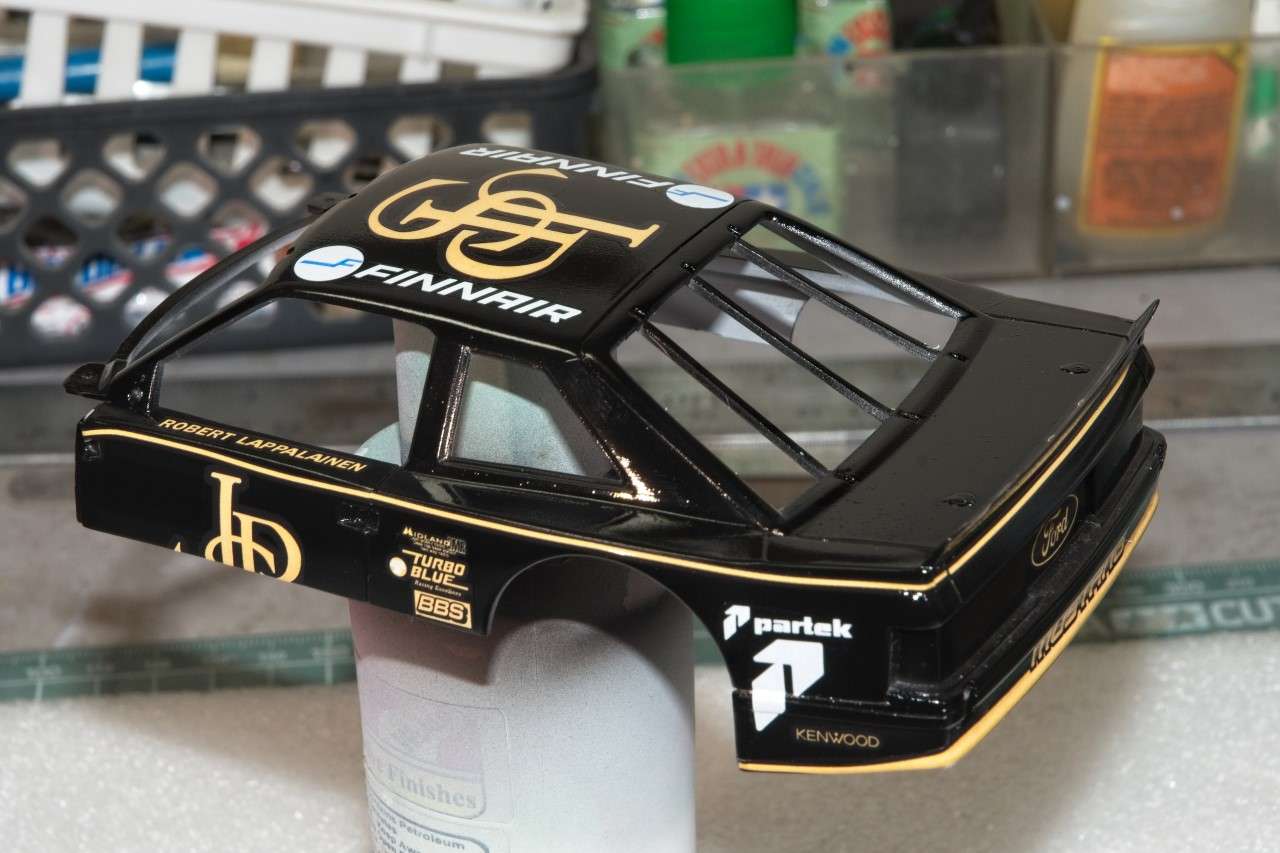 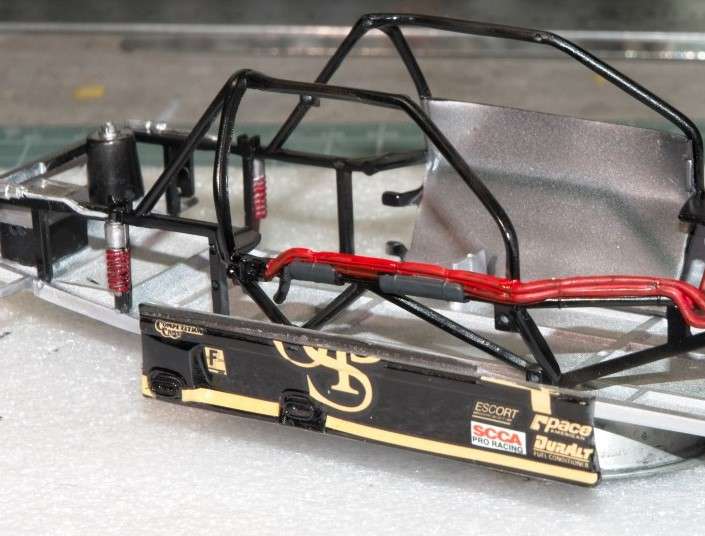 Thanks to all for stopping by, and checking out my build to date. It's always much appreciated. Joel |
|
|
|
Post by arcticwolf on Nov 3, 2019 9:03:52 GMT -8
I love it so far. I'll never be able to come close to that.
|
|
|
|
Post by arcticwolf on Nov 3, 2019 9:05:28 GMT -8
Sorry for the picture quality, I think it was taken with my old cell phone
|
|
|
|
Post by Joel_W on Nov 3, 2019 9:47:03 GMT -8
Paul,
Thanks so much for your most positive comment. It's greatly appreciated. And your picture is exactly what I've been looking for. Already saved it to my work folder.
Joel
|
|
cc
Full Time Ride
  
Posts: 141
|
Post by cc on Nov 9, 2019 5:35:05 GMT -8
Joel, Just back to being able to look around. Long family move. Your Mustang is looking great. The JPS color scheme is so iconic and there is almost no car that it would not inprove the look. Ill keep an eye and check in when I can. Keep up the great job.
CC 😎
|
|
|
|
Post by Joel_W on Nov 9, 2019 6:36:49 GMT -8
Joel, Just back to being able to look around. Long family move. Your Mustang is looking great. The JPS color scheme is so iconic and there is almost no car that it would not inprove the look. Ill keep an eye and check in when I can. Keep up the great job. CC 😎 CC, Thanks for the thumbs up, it's always greatly appreciated. Joel |
|
|
|
Post by arcticwolf on Nov 9, 2019 13:43:19 GMT -8
I just got my Revell kit in the mail today. Still shrink wrapped! Now all I have to do is try to come close to what you're doing.
|
|
|
|
Post by Joel_W on Nov 10, 2019 7:44:54 GMT -8
I just got my Revell kit in the mail today. Still shrink wrapped! Now all I have to do is try to come close to what you're doing.
Paul, I have all the confidence in your modeling skills to far surpass my modest efforts. I'm still struggling just to find modeling time these days as family life and issues just continues to jump in my way. Joel |
|
|
|
Post by Joel_W on Nov 16, 2019 13:36:59 GMT -8
It's been quite a few days since I last updated my Roush Trans Am JPS Mustang. Honestly, I haven't had much time of late between the same family issues that just never seem to get resolved, and now with the holidays approaching way to fast. But I've managed to get some work accomplished. I still haven't rubbed out the clear coat as yet, but it's on the top of my "To Do" list this coming week. Instead, I started to focus on various parts and planning details like hoses, braided lines, and electrical lines. I added the fuel cell, dry sump oil tank, and battery box in the trunk compartment and started to drill the necessary holes for the various lines, keeping in mind that the only viewing angle will be through the glass panel in the trunk lid that will be closed. 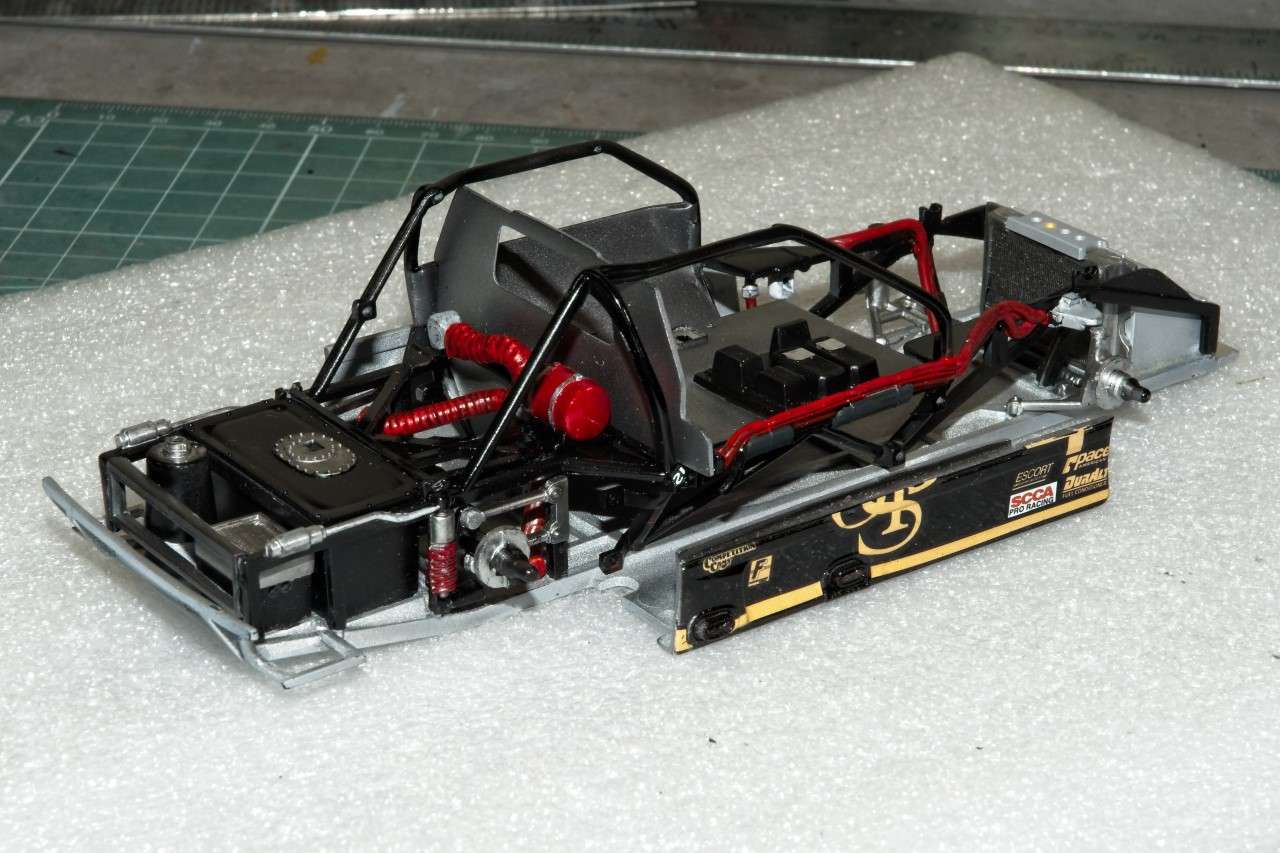 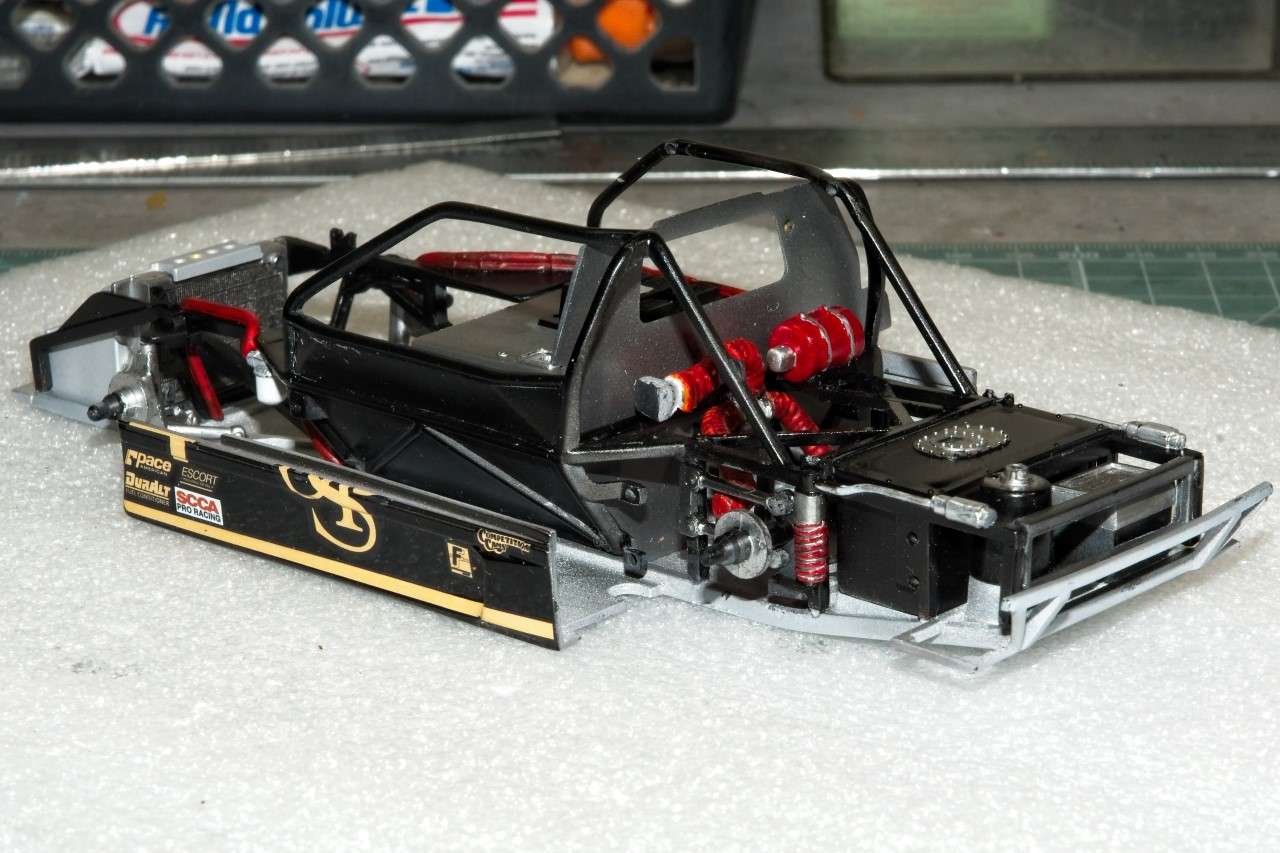 ![]() Then I started to focus on the driver's compartment by test fitting the rear bulkhead. There's still a few electrical boxes to be added as well as all the various wiring to add before it's glued into place. And then the right side Aluminum sheet cover that all the various lines etc. pass through rather then just being clamped to the driver compartment floor, plus the wiring for the electrical boxes on the top of it. 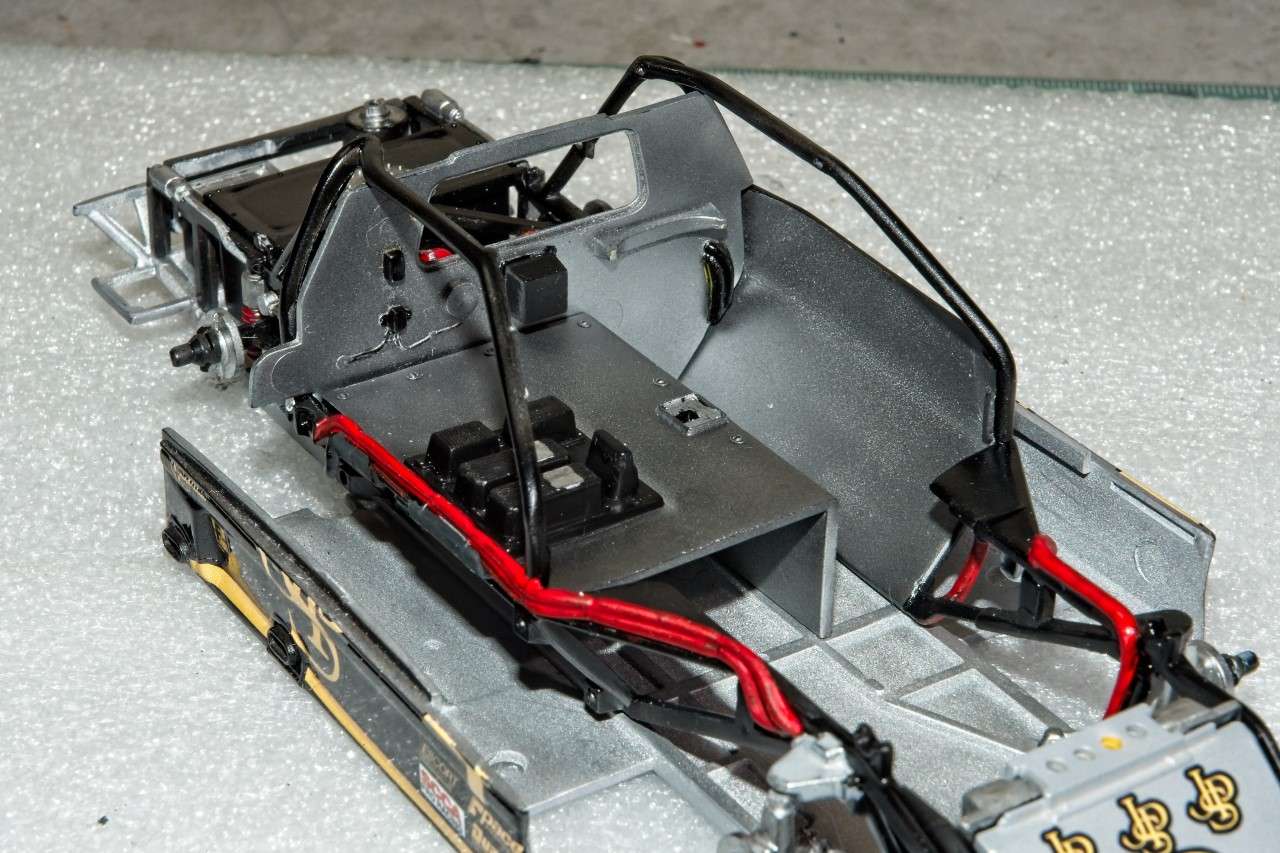 ![]() 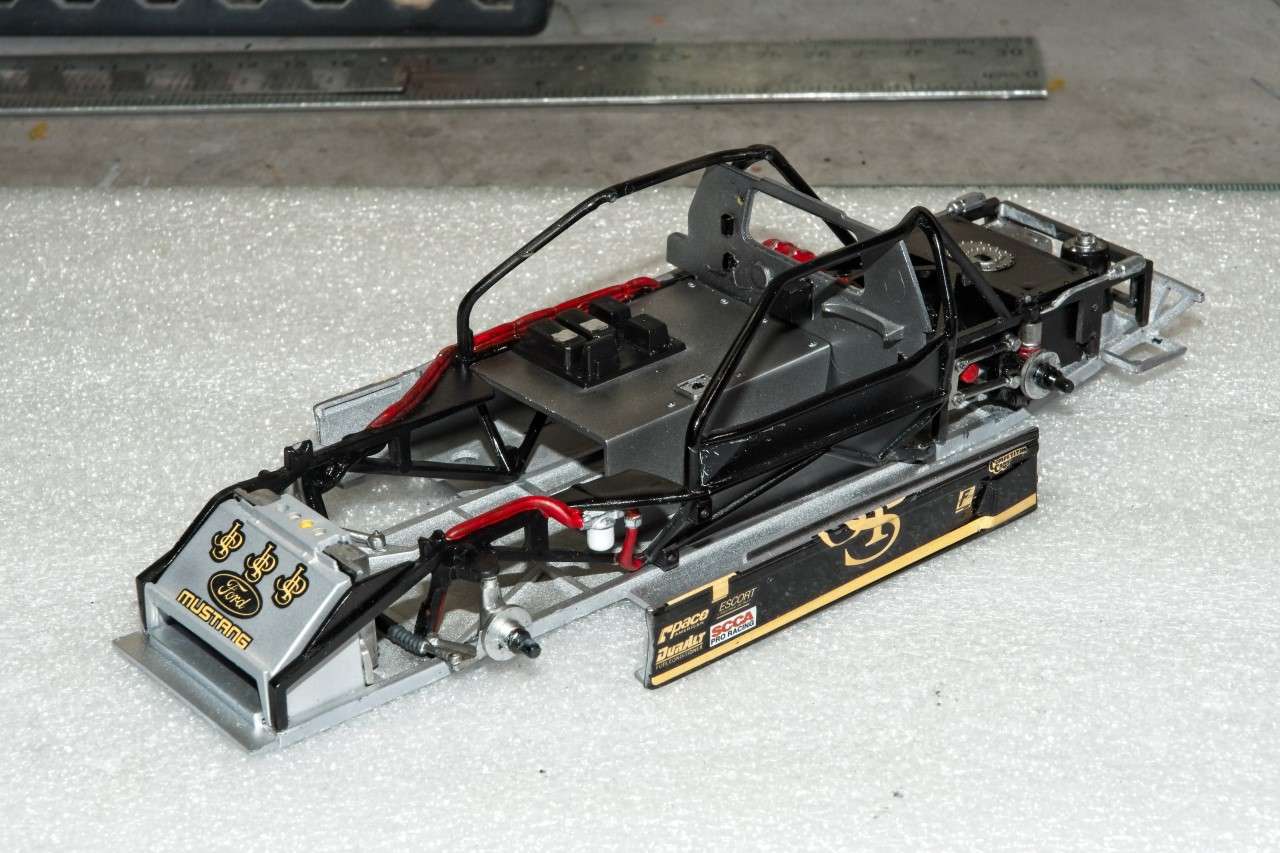 ![]() And that where I'm presently at. 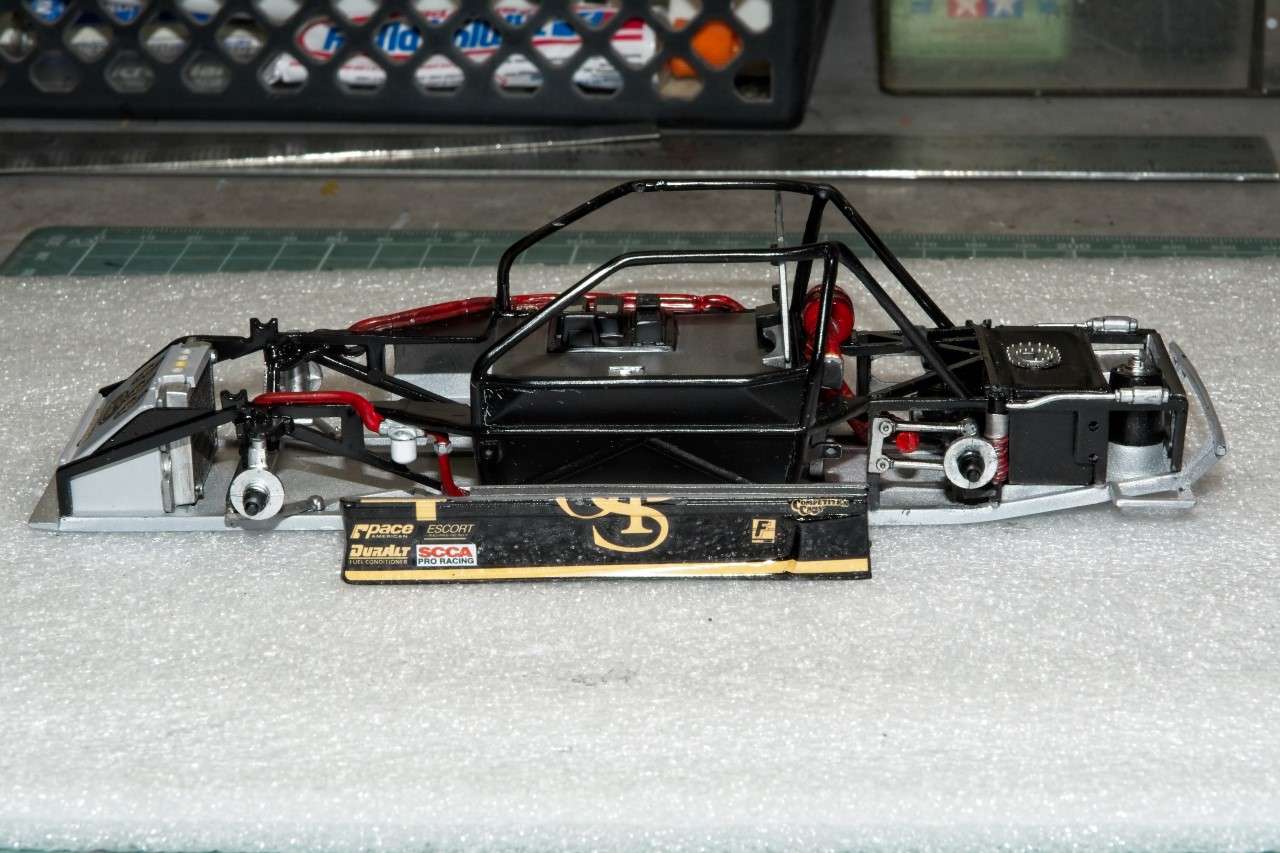 Joel |
|
|
|
Post by arcticwolf on Nov 22, 2019 9:08:29 GMT -8
I've started some work on this kit of my own. I decided to skip your steps of priming and painting the car a different clour and then stripping it off, so I just painted it black. Just kidding, my friend. And I concur that the Revell plastic seems to be resistant to Tamiya cement. So far I've just used my old standby, "Bob Smith Insta Cure" which I've found glues anything to anything, especially skin to skin. As to the JPS decal colour, I'm going to start a new thread about this topic. Keep up the good work, looks great so far Joel Paul
(as to the tube frame, I can't figure out what colour it may have been originally, so I went with my old standby = industrial grey)
|
|
|
|
Post by Joel_W on Nov 22, 2019 9:49:35 GMT -8
Paul, Looking forward to your build blog as I've never had the fun of two guys on any list building the same model at the same time. I'm still looking for a glue that really melts into the weird Revell glue. I've got a feeling that their old tube glue would be the best bet. I'm using a lot of the Model Master glue with so so results. As for what color the frame should be, well, it depends on who owned the car as I've got a few different colors if it's a restoration or a works Roush car. Here's a few pictures of the original Roush car. The tube frame is definitely Gloss Black. The chassis is all shades of Aluminum sheet. 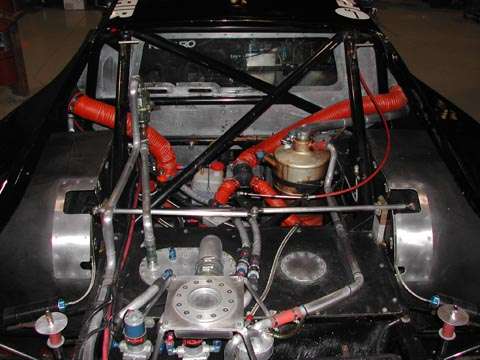 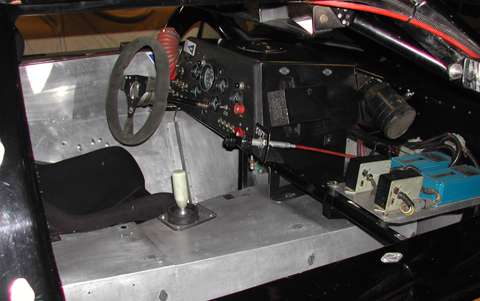 Joel |
|